How Do I Add a File That Can Be Downloaded by Users?
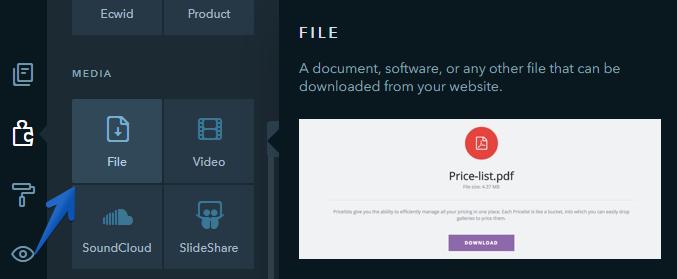
To upload files to your website, use the File widget that can be found in the Builder under Media.

Place the widget on the page and click on it. In the settings, click Change to upload a file or just drag it.
Below you can see the list of files and formats supported in the File widget.
Text Files
- plain
- rtf
Images
- vnd
- djvu
- png
- jpg / jpeg
- gif
- tiff
- x-icon
- bmp
- x-bmp
- x-ms-bmp
Other Files
- .*opendocument.*
- .*ms-excel
- .*openxmlformats.*
- msword
- zip
- x-rar
- x-tar
- x-gzip
Note:
You can upload a file up to 30 Mb.
In the File widget settings you can:
- Specify the file name
- Add a file description
- Assign an action on click to a file: download the file, open in the current or a new window. By default, all files get downloaded. To change this default action, click on the widget and select the necessary option on the left panel. This setting is available for all types of files supported on uKit, but if a particular file type cannot be viewed due to browser limitations, the file will be downloaded.
- Select a widget design
- Set up alignment
- Set up the display of widget elements
- Add a class for the widget
- Enabling statistics

Note:
Changes made to the File widget can only be seen on the published site — a file can’t be opened or downloaded in the Preview and Editor mode.
Was this article helpful?
39 people found this article helpful.
