How Do I Set Up a Pixel on the Website and Why Do I Need It?
Pixel is a web analytics tool that helps measure the effectiveness of marketing campaigns and analyze people’s actions on your website.
In the uKit builder, you can connect a Facebook Pixel to your site. This option is available for the Basic, eCommerce and Pro Plans.
Why Do I Need a Pixel
Pixel is a very useful and convenient tool for retargeting, tracking conversion rates and optimizing marketing campaigns. See the details below:
- Retargeting is a way of displaying an advertisement depending on the visitors’ interests. Every time a new visitor comes to your site, the pixel saves information about this visitor’s social media and shows them targeted ads.
- Conversion rate tracking. A pixel lets the webmaster track visitor’s actions from any device. The pixel saves information about the visitor’s actions and shows targeted ads to that person.
- Marketing campaign optimization. Adding a pixel is a great way to make your advertising efforts more effective by checking and optimizing certain parameters. After collecting the information about visitor’s actions, the pixel changes the ad configurations to increase its effectiveness and boost the sales on your site.
How Do I Set Up a Facebook Pixel
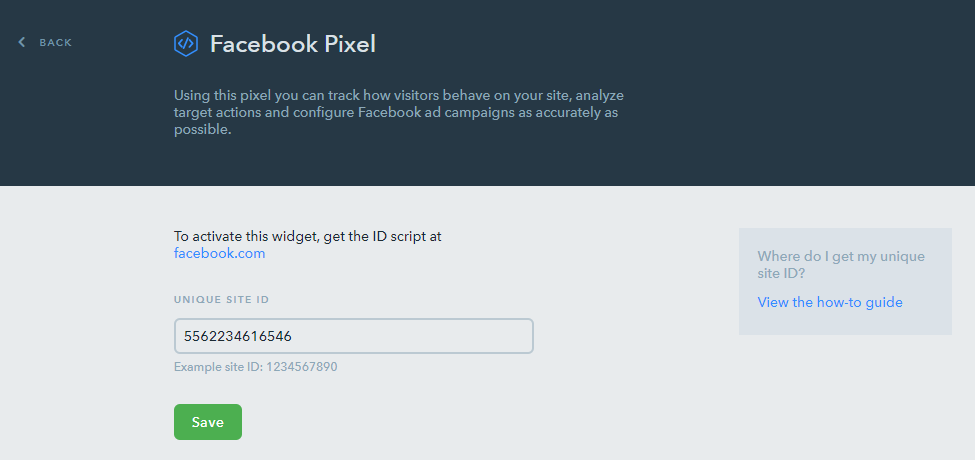
1.Click on the Facebook Pixel widget on the uKit Dashboard.

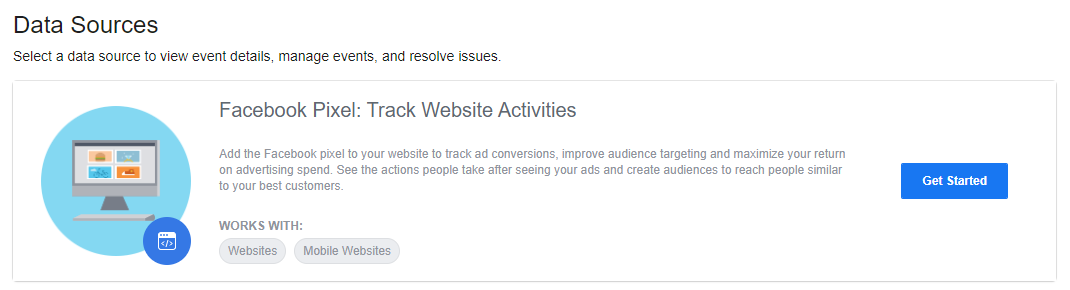
2.Create a Facebook account and go to Events Manager to create a pixel.
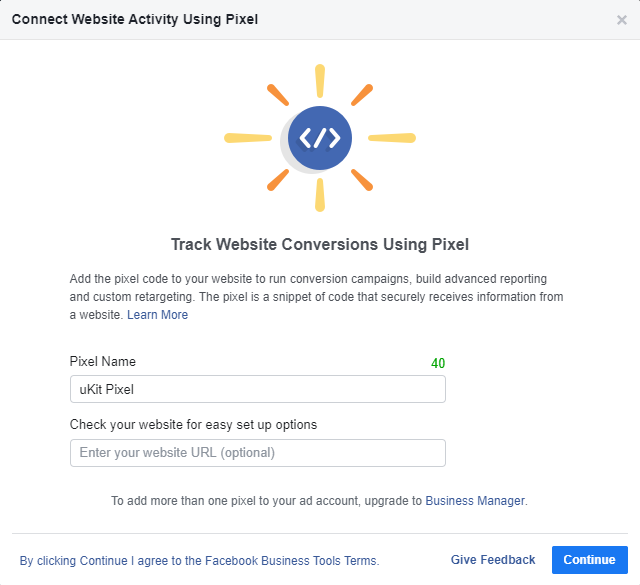
3.In the window that will appear, enter the pixel name and your site URL and click on Continue.
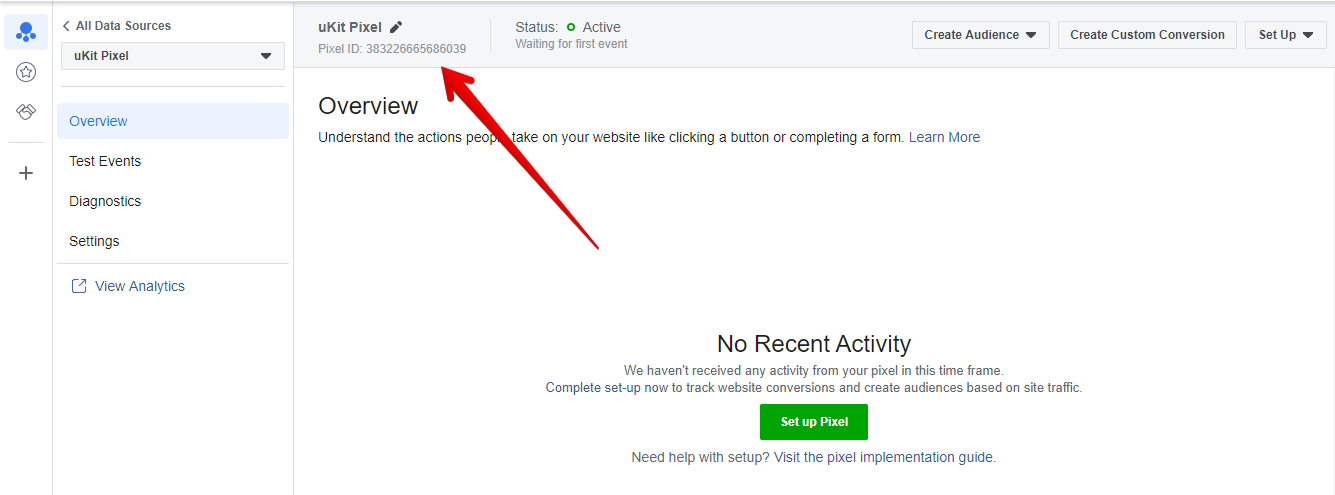
4.Close the window with the pixel code installation options and copy the pixel ID on the page that will appear.
5.Go back to the uKit Dashboard, enter the ID to the input field and click on Save.