Integration with Kommo (formerly amoCRM)

Kommo (formerly amoCRM) is a customer relationship management (CRM) system that keeps track of all potential customers and orders, and helps increase your sales.
To integrate your website with Kommo (formerly amoCRM), click on the amoCRM widget on the uKit Dashboard.

Create an account and sign in.
Go to Kommo (formerly amoCRM) and create a new account. Click on Try It Free at the top of the screen and fill out the necessary fields. You will receive an email with the registration data. Complete the registration following the tips.
Сonnect the account on the uKit Dashboard. If you already have an account, you can connect it:

After clicking Connect, log in to your Kommo account if needed:
Allow uKit to perform actions below, selecting an account from the drop-down list:
Where Do I Find Account Address?
Log in to your Kommo account.
Account address is a unique part of your Kommo account address. You can find it in the URL bar before "kommo.com".

Note:
Learn more about using Kommo in their FAQ.
To keep track of customers in Kommo, you need to properly set up feedback forms, pop-up windows, and order forms of the uKit online store.
How Do I Set Up a Feedback Form?
A message sent via a feedback form or an order form in your uKit online store automatically becomes a Lead in KommoM. Leave the uKit forms untouched, if you simply want to store your customer orders in one place. But if your goal is to build a client base with names and contacts (List in Kommo), you need to make sure the feedback forms on your uKit website are set up in a certain way.
Kommo uses the following info to create a contact in your client base:
- Name
- Email or Phone number
Note:
Make sure that the Name and Email/Phone fields are included into uKit website forms and set as required. It’s important to select exactly Name, Phone, or Email field types from the list when you add them:
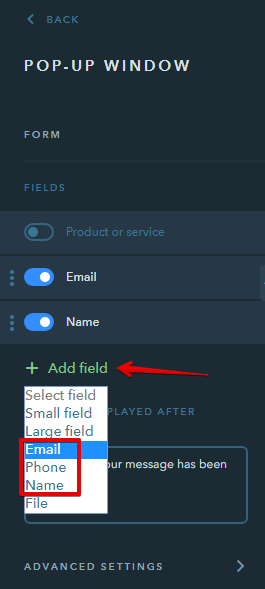
Setting up Forms
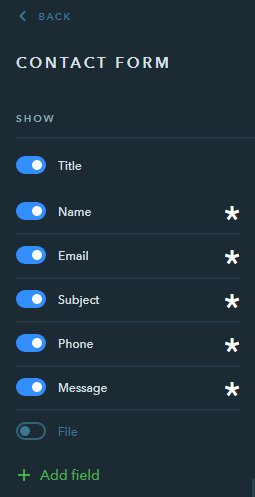
Check if the form has these required fields:
- Name
- Email or Phone number
Note:
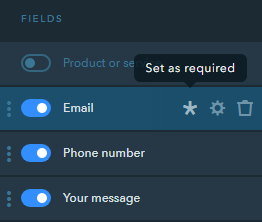
Set these fields as required to make communication with your customers more convenient.
The Email field is active in pop-up settings by default while Name is supposed to be enabled manually.
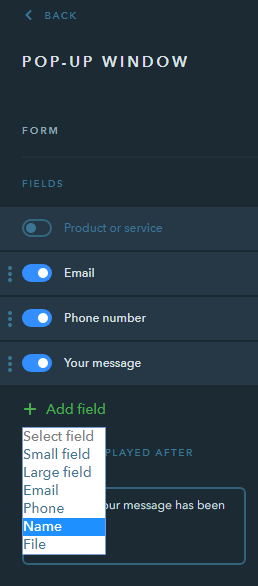
Set these fields as required.
Note:
If you are not sure that the proper field types are used for collecting names, emails and phone numbers, we recommend deleting them and add Name, Email or Phone fields again.
Go to the online store settings.

Click on Order form and set the following fields as required:
- Name
- Email or Phone number

Note:
It’s easy to make sure your form is properly set up — it will contain the Name, Email and Phone required fields which have an icon on the right. If some field doesn’t have an icon, remove this field and add it again.
Once your fields are set up, Kommo will start building your client base with contacts as well as making a list of your leads.