How Do I Set Up a Domain-Based Email Address with Yandex?
Note:
From April 17, 2023, the free version of Yandex 360 for Business has been disabled. The use of domain-based emails is only available on paid plans. Organizations that have up to three users, including the administrator, will not be affected by these changes.
To create a domain-based email address, you can use any service that provides this feature, for example domain.yandex.com. Setting up an email with this service is absolutely free, fast and easy, you just need to follow the guidelines on their website.
What does Yandex.Mail include?
- 1,000 mail accounts
- unlimited inbox size
- 20 GB of cloud storage space
- built-in antivirus
- management from mobile devices
To set up a domain-based email account with Yandex.Mail:
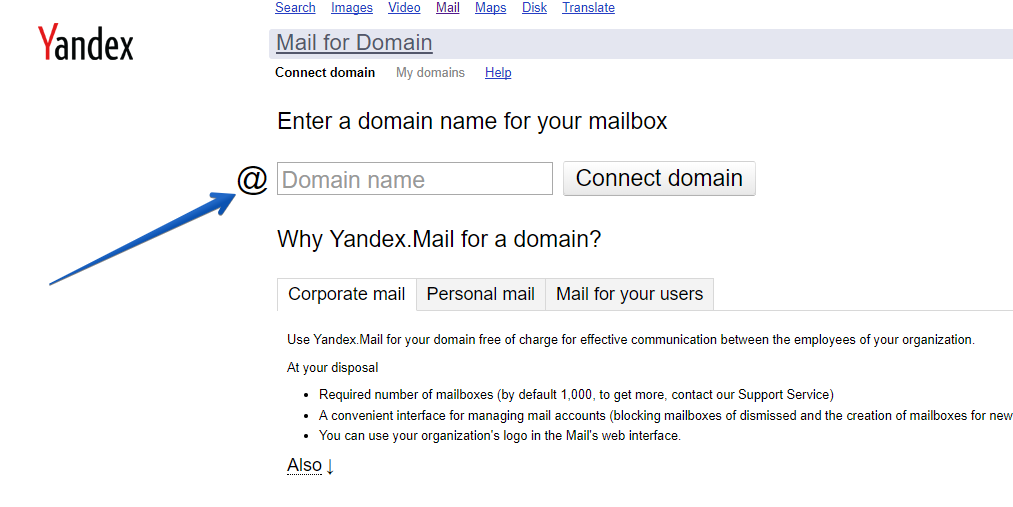
1. Head over to https://domain.yandex.com, enter your domain name and click Connect Domain.
Note:
If you are new to Yandex, you will need to create an account and log in there to proceed with setting up a personalized mailbox.
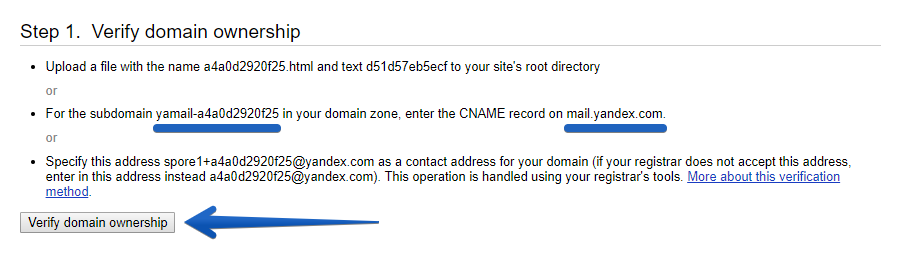
2. You will be given a number of options to verify your domain ownership. At step 1, copy a CNAME record — this is a record that needs to be specified on the side of uKit.
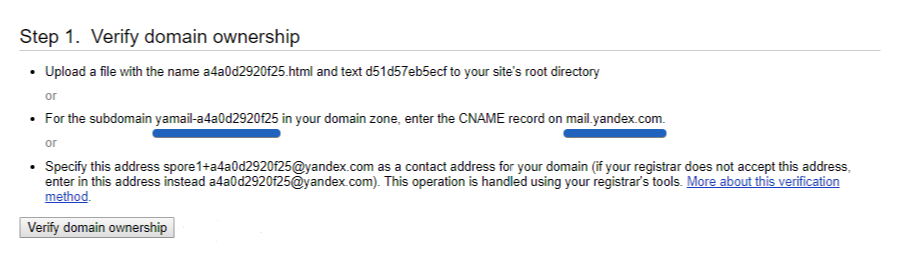
Note:
A CNAME record is unique for each domain, the record in the picture is an example.
3. Go to the uKit Dashboard and select a website you want to set up an email for in the top left. Please note that this website needs a custom domain to be attached. Once done, open the Domains section.
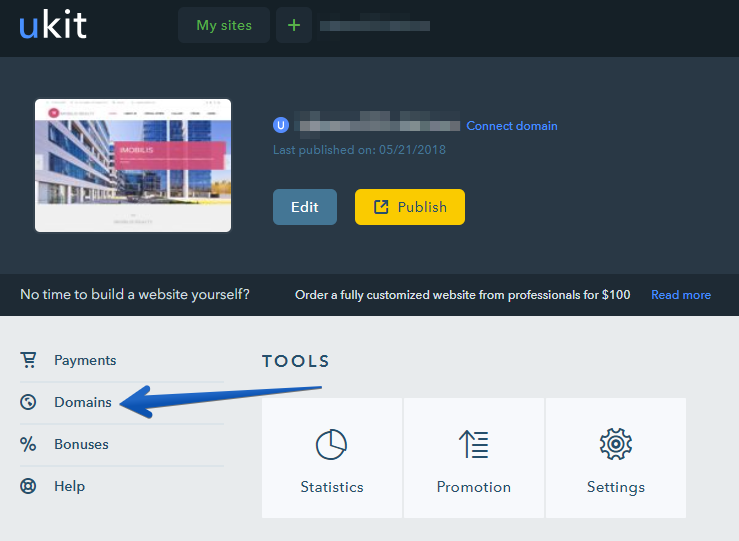
Note:
If managing your domain records looks overly technical to you, you can contact our Support Agents to help you set them up.
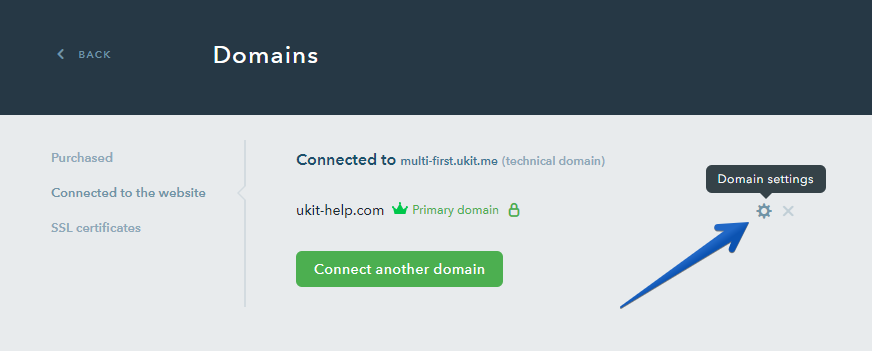
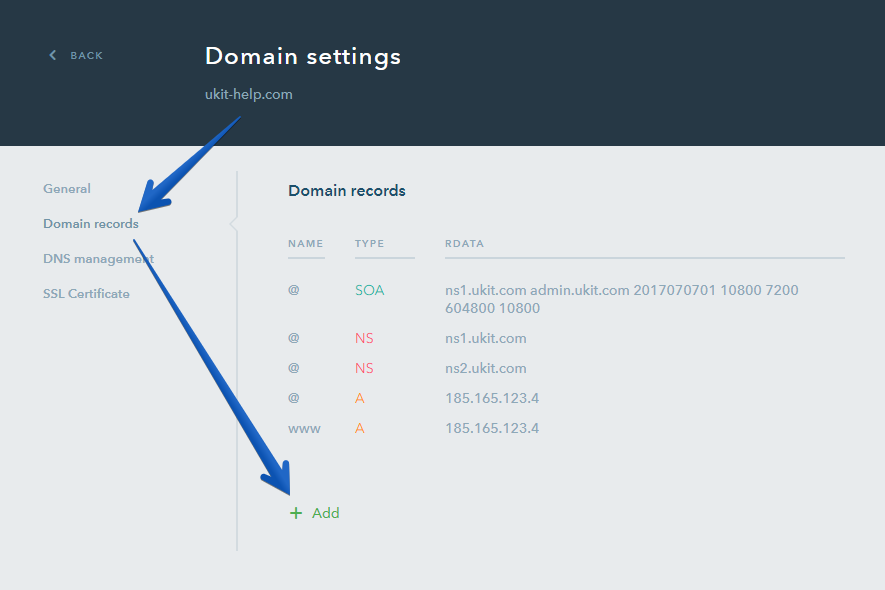
4. Under Domains, click on the “gear” icon next to the connected domain name.
5. Select Domain records and click on +Add.
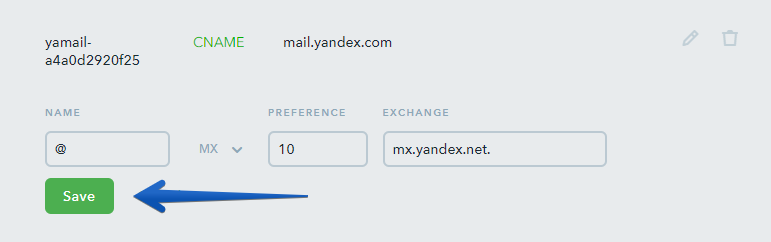
6. Specify the CNAME records for your domain. Enter the subdomain name, e.g. yamail-b0f2424480c8 to the first field and the value mail.yandex.com to the second one. To find out what values need to be entered exactly, refer to step 2 of this manual. After you have added the records, save changes and wait until they are enabled. (Change of a CNAME record can take up to 72 hours to come into effect but typically this happens much sooner.)
7. Go back to the domain verification page on Yandex and click Verify domain ownership.
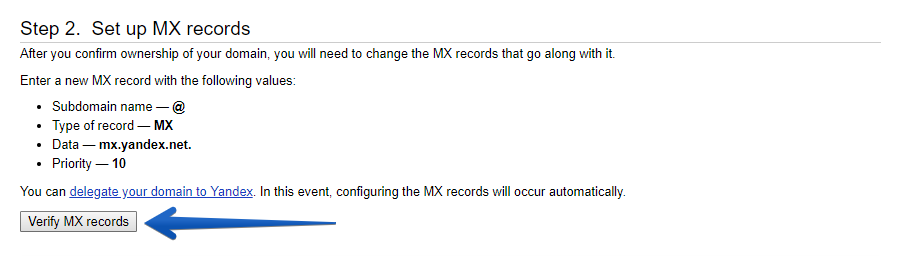
8. You will be taken to the page with your MX records. Copy them to add in the Domain records section of your uKit Dashboard.

9. In the Domain records section, click on +Add. This time you need to select an MX record.
10. You will see 3 fields to fill in. Type in @ for the first one, 10 for the second and mx.yandex.net for the third so it looks like this:
- @ MX 10 mx.yandex.net
11. Return to the Yandex page and click on Verify MX records.
12. That’s basically it — your domain-based email has been successfully set up! To implement security measures for your mailbox, you can also configure an SPF record. This way, the messages sent by you won’t end up in the spam folder.
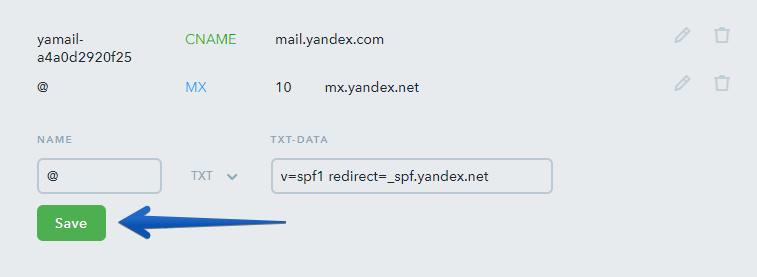
13. On uKit Dashboard under the Domain records tab, add a TXT record with the correct values: @ for the first field and v=spf1 redirect=_spf.mail.ru for the second one:
- @ TXT v=spf1 redirect=_spf.yandex.net
Now you should be able to send and receive emails with your custom domain — test it out by sending and receiving messages via your new Yandex account.
Tip:
You can also add a DKIM signature for your domain. This is not obligatory but with it, your emails are less likely to be marked as spam. You can get this signature in the bottom right of your Yandex dashboard or on this page.
If you have any questions about setting up a domain-based email address, feel free to contact the Support Team.